Cottage Cheese Brownies with Dates
Highlighted under: Sugar Rush Kitchen
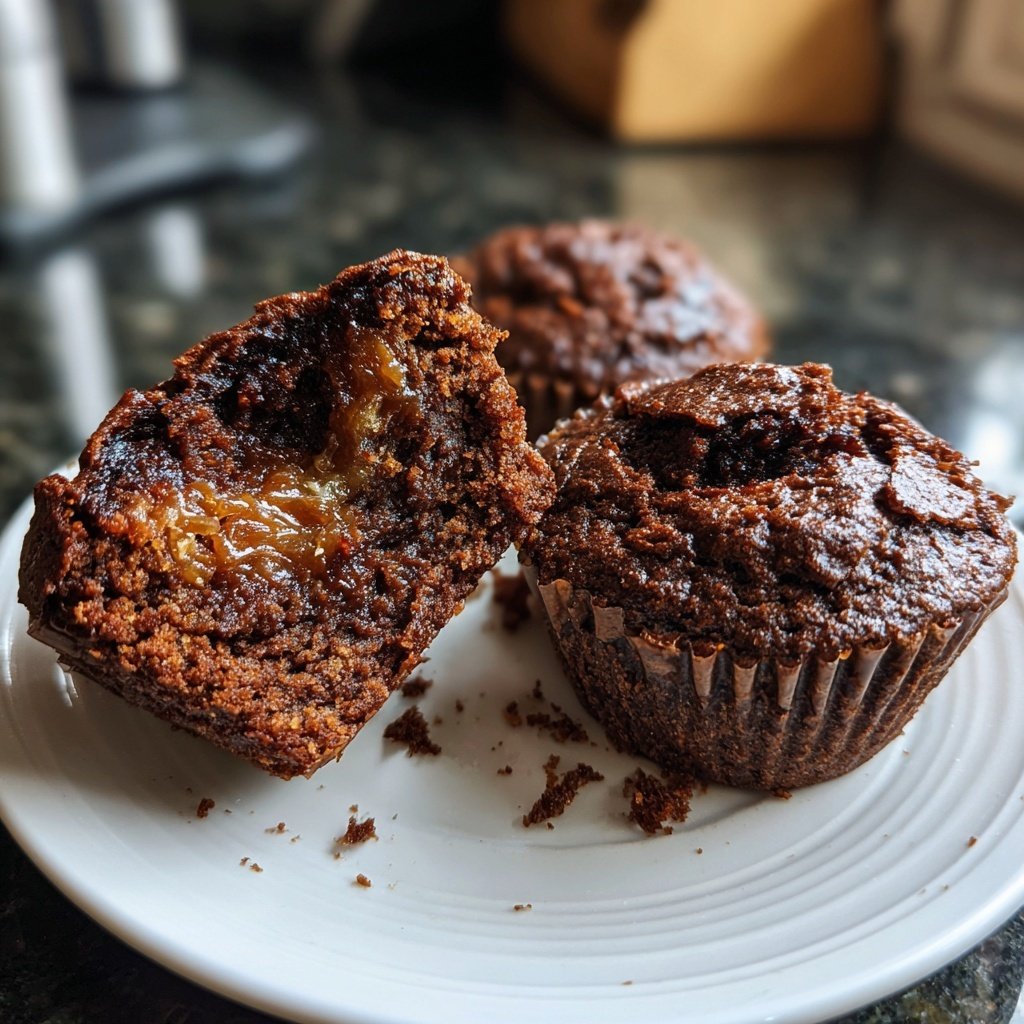
I love making Cottage Cheese Brownies with Dates because they combine the rich, fudgy texture you crave with a healthier twist. The dates add natural sweetness while the cottage cheese keeps things moist without using a ton of butter. It’s a guilt-free indulgence that satisfies my chocolate cravings. I often whip these up when I have unexpected guests, and they always leave raving about how decadent they taste. Plus, they’re super quick to prepare, making them perfect for any occasion!
When I first tried Cottage Cheese Brownies with Dates, I was amazed by how satisfying they were despite being a healthier option. The dates provide a natural sweetness, which means I can reduce added sugars without sacrificing flavor. The incorporation of cottage cheese not only helps in getting a fudgy texture but also ups the protein content, making this dessert a bit more nutritious.
One day, I experimented with adding a bit of espresso powder to the mix, and it elevated the chocolate flavor significantly without overpowering the original taste. If you want to try something different next time, consider this small addition. It turned my favorite brownies into an even more delightful treat!
Why You'll Love These Brownies
- Rich chocolate flavor perfectly balanced with natural sweetness from dates
- Fudgy and moist texture that satisfies chocolate cravings
- A healthier dessert option with added protein from cottage cheese
Understanding Key Ingredients
Cottage cheese is the star of these brownies, providing a moisture level that butter can't match while also sneaking in extra protein. It’s crucial to use smooth cottage cheese to ensure a consistent texture in your brownies. If the cheese is lumpy, it may affect the final outcome. If you're short on time, you can also use ricotta as a substitute, but make sure to blend it well for that creamy consistency.
The dates are not just for sweetness; they add a rich depth of flavor that complements the cocoa. Medjool dates are ideal due to their softness and sweetness. If you find that your dates are a bit firm, soaking them in hot water for about 10 minutes can help soften them for easier blending. If you're aiming for reduced sugar, feel free to use fewer dates and a touch more honey or maple syrup for balance.
Perfecting the Baking Process
When mixing the wet and dry ingredients, aim for a smooth batter without overmixing, as this can lead to tough brownies. You should see a well-combined mixture that shows no dry flour, but don’t worry about some small lumps. The goal is a fudgy texture, so err on the side of under-mixing rather than overdoing it. I often fold the mixture gently with a spatula to maintain that desired density.
Baking for exactly 25 minutes is key to achieving the fudgy center while the edges become set. An important tip is to keep an eye on the brownies towards the end of this time. You want a toothpick inserted in the center to come out with a few moist crumbs, as that indicates a perfect bake. If you find that the brownies are overly done, you'll lose that coveted fudgy texture.
Ingredients
For the Brownies
- 1 cup cottage cheese
- 1 cup pitted dates, chopped
- 1/2 cup unsweetened cocoa powder
- 1/2 cup all-purpose flour
- 1/2 cup honey or maple syrup
- 2 large eggs
- 1 tsp baking powder
- 1 tsp vanilla extract
- 1/4 tsp salt
Mix well and prepare for baking.
Instructions
Preheat the Oven
Preheat your oven to 350°F (175°C) and grease an 8x8-inch baking pan.
Blend Ingredients
In a blender or food processor, combine the cottage cheese, chopped dates, eggs, and vanilla extract. Blend until smooth.
Mix Dry Ingredients
In a bowl, mix together the cocoa powder, flour, baking powder, and salt.
Combine Mixtures
Pour the wet mixture into the dry ingredients and stir until just combined. Don't overmix.
Bake
Pour the batter into the prepared pan and bake for 25 minutes. A toothpick inserted should come out slightly moist.
Cool and Serve
Let the brownies cool in the pan for about 10 minutes before slicing them into squares and serving.
Enjoy your delicious and guilt-free brownies!
Pro Tips
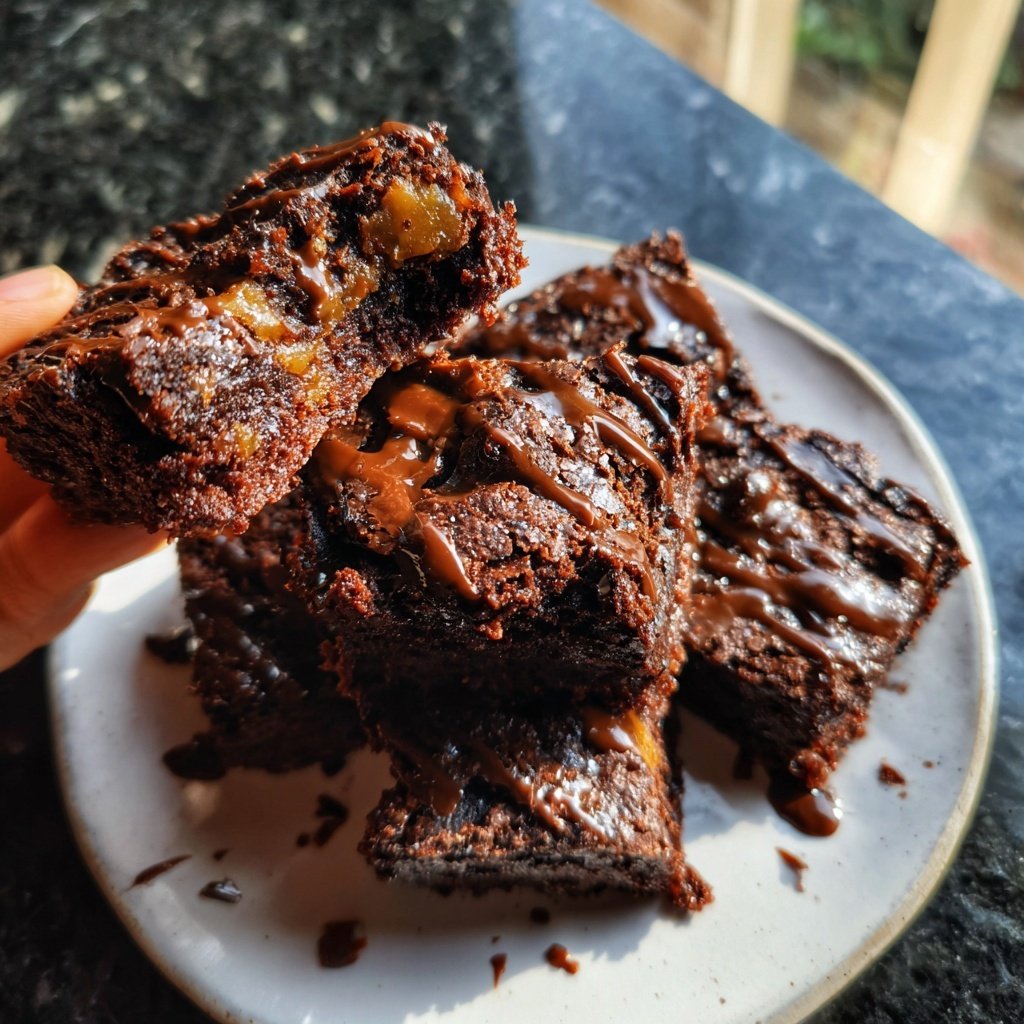
- For an extra touch, melt some dark chocolate and drizzle it over the brownies before serving.
Serving Suggestions
These brownies can be enjoyed plain, but to elevate them further, consider pairing them with a dollop of whipped cream or a scoop of vanilla ice cream. The contrast between the warm, fudgy brownie and the cool creaminess creates a delightful experience. Another option is to sprinkle some sea salt on top right before serving—I find this enhances the chocolate flavor beautifully.
If you're feeling adventurous, add nuts or chocolate chips to the batter for extra texture and flavor. Chop walnuts or pecans finely and stir them in when combining the wet and dry ingredients. Just be cautious of baking time; if you add too many chunky ingredients, extending the bake time slightly might help ensure they cook evenly.
Storage Tips
These brownies store well, making them great for meal prep or make-ahead treats. After they’ve cooled completely, store the brownies in an airtight container at room temperature for up to 3 days. For longer storage, you can refrigerate them for up to a week, or freeze them for up to 3 months with proper wrapping.
To freeze, wrap individual brownies tightly in plastic wrap, then place them in a freezer-safe bag or container. When ready to enjoy, thaw them at room temperature for about an hour. I love popping them in the microwave for about 10-15 seconds for a warm, gooey treat—perfect for satisfying those late-night chocolate cravings!
Questions About Recipes
→ Can I use other sweeteners instead of honey?
Yes, you can substitute honey with maple syrup or agave nectar for a vegan option.
→ How can I store these brownies?
Store them in an airtight container in the fridge for up to a week.
→ Can I freeze these brownies?
Absolutely! Just wrap each brownie individually and store in the freezer for up to three months.
→ What should I serve with these brownies?
They pair wonderfully with a scoop of vanilla ice cream or a dollop of whipped cream.
Cottage Cheese Brownies with Dates
Created by: Blair Hudson
Recipe Type: Sugar Rush Kitchen
Skill Level: Beginner
Final Quantity: 12 brownies
What You'll Need
For the Brownies
- 1 cup cottage cheese
- 1 cup pitted dates, chopped
- 1/2 cup unsweetened cocoa powder
- 1/2 cup all-purpose flour
- 1/2 cup honey or maple syrup
- 2 large eggs
- 1 tsp baking powder
- 1 tsp vanilla extract
- 1/4 tsp salt
How-To Steps
Preheat your oven to 350°F (175°C) and grease an 8x8-inch baking pan.
In a blender or food processor, combine the cottage cheese, chopped dates, eggs, and vanilla extract. Blend until smooth.
In a bowl, mix together the cocoa powder, flour, baking powder, and salt.
Pour the wet mixture into the dry ingredients and stir until just combined. Don't overmix.
Pour the batter into the prepared pan and bake for 25 minutes. A toothpick inserted should come out slightly moist.
Let the brownies cool in the pan for about 10 minutes before slicing them into squares and serving.
Extra Tips
- For an extra touch, melt some dark chocolate and drizzle it over the brownies before serving.
Nutritional Breakdown (Per Serving)
- Calories: 200 kcal
- Total Fat: 7g
- Saturated Fat: 3g
- Cholesterol: 70mg
- Sodium: 90mg
- Total Carbohydrates: 30g
- Dietary Fiber: 4g
- Sugars: 18g
- Protein: 6g